


P0095
Share with Mechanic
Powertrain Diagnostic
Standard OBD-II Diagnostic Protocol
Fault Description & Technical Meaning:
Intake Air Temperature Sensor 2 Circuit Bank 1. This diagnostic trouble code has detected an abnormal operating condition or electrical signal failure. The Intake Air Temperature (IAT) Sensor measures ambient intake air temperature so the ECU can compensate for air density variations in cold or hot weather. When this circuit fails, the vehicle computer illuminates the Check Engine / Warning Light and may log an active diagnostic fault code.
Diagnostic Summary: Diagnostic code P0095 triggers due to a circuit malfunction affecting the Intake Air Temperature (IAT) Sensor, impacting proper vehicle operation.
Related Components (Photo & Inspection)
3 Components (Tap to Zoom)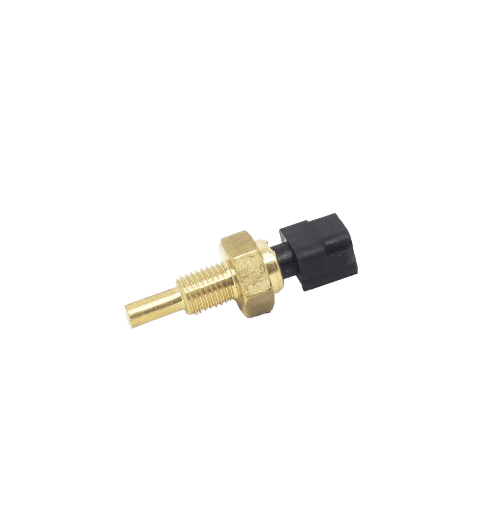
Sensor
EOT Sensor (Engine Oil Temperature)
Click to inspect photo & test specs
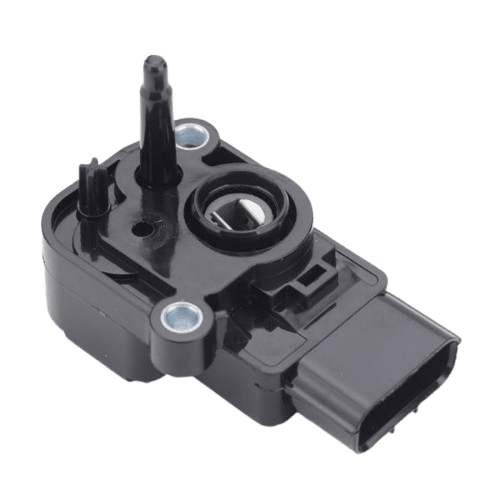
Sensor
IAT Sensor (Intake Air Temperature)
Click to inspect photo & test specs

Electrical
12V Motorcycle Battery
Click to inspect photo & test specs
Common Symptoms
- • Check Engine Light (MIL Lamp): Illuminates or flashes on the speedometer console.
- • Engine Hesitation & Jerking: Poor throttle response during sudden acceleration.
- • Drop in Fuel Economy: Open-loop fuel spraying increases petrol consumption and causes black smoke.
- • Hard Cold Starting: Engine dies during idle or requires multiple starter button attempts.
Common Root Causes
- • Wiring Harness Damage: Chafed wires touching motorcycle frame metal or rodent cuts.
- • Loose / Corroded Coupler: Green oxidation or loose push-fit pins inside connector plug.
- • Defective Component: Burnt internal sensing thermistor or solenoid actuator coil.
- • Low Battery Voltage: Weak motorcycle battery under 12.0V causing ECU reference error.
Step-by-Step Diagnostic & Repair Procedure
Bench-tested repair procedure for code P0095
Step 1:
Turn off the vehicle ignition switch, remove the key, and allow all electrical and mechanical systems to cool down completely. Locate the Intake Air Temperature (IAT) Sensor, typically positioned inserted inside the air cleaner filter housing or intake air snorkel duct.
Step 2:
Carefully unplug the electrical wiring coupler from the Intake Air Temperature (IAT) Sensor. Inspect the connector pins and socket terminals for green copper corrosion, water moisture, bent pins, or melted plastic. Trace the wiring harness back toward the control module and check for chafing, wire cuts, or melted insulation touching vehicle metal.
Step 3:
Set a digital multimeter to DC Volts and turn the ignition key ON without starting the engine. Check for proper electrical reference voltage (5.0V reference or 12V battery power depending on component specification). Next, set the meter to Ohms (continuity) and measure the signal wire voltage and ground continuity with a digital multimeter to ensure the ground circuit has less than 0.5 Ohms resistance to the chassis ground.
Step 4:
Bench-test the component by measuring its internal resistance across the electrical terminals using your multimeter (5.0V reference voltage feed and sensor resistance (approx 2,000 to 2,500 Ohms at room temperature 25°C)). If the component is carbon-fouled, contaminated, or has poor pin tension, clean it carefully using dedicated electrical contact cleaner. If the internal coil or sensor circuit shows zero Ohms (short) or infinite Ohms (open), replace the component with a genuine OEM part.
Step 5:
Reconnect the electrical coupler firmly until the locking tab audibly clicks into place. Connect an OBD-II diagnostic scanner or use the OkBike Mechanic App to erase stored DTC fault memory from the ECU. Start the engine or power up the vehicle, perform a test drive covering varied speeds, and verify that the Warning Light remains permanently turned off.
Important Note: Simply replacing the sensor does not immediately clear the Check Engine Light (MIL). Connect an OBD-II scanner to the motorcycle diagnostic connector and execute "Erase Stored DTC Memory" followed by a road test.
Related Diagnostic Fault Codes
P0092
Fuel Pressure Regulator A Control Circuit High. This diagnostic trouble code indicates that circuit voltage exceeds the maximum allowable threshold (typically indicating a short-circuit to 12V battery power or a missing ground). The Fuel Volume Regulator / Pressure Solenoid regulates fuel volume and rail pressure delivered from the high-pressure fuel pump to the fuel injectors. When this circuit fails, the vehicle computer illuminates the Check Engine / Warning Light and may log an active diagnostic fault code.
P0093
Fuel System Leak Detected - Large Leak. This diagnostic trouble code has detected an abnormal operating condition or electrical signal failure. The Powertrain Diagnostic Subsystem controls essential electronic fuel, air, and ignition parameters to maintain stable combustion and low exhaust emissions. When this circuit fails, the vehicle computer illuminates the Check Engine / Warning Light and may log an active diagnostic fault code.
P0094
Fuel System Leak Detected - Small Leak. This diagnostic trouble code has detected an abnormal operating condition or electrical signal failure. The Powertrain Diagnostic Subsystem controls essential electronic fuel, air, and ignition parameters to maintain stable combustion and low exhaust emissions. When this circuit fails, the vehicle computer illuminates the Check Engine / Warning Light and may log an active diagnostic fault code.
P0096
Intake Air Temperature Sensor 2 Circuit Range/Performance Bank 1. This diagnostic trouble code indicates an in-range rationality fault where the sensor is sending a signal, but the value contradicts other sensor readings or expected physical limits. The Intake Air Temperature (IAT) Sensor measures ambient intake air temperature so the ECU can compensate for air density variations in cold or hot weather. When this circuit fails, the vehicle computer illuminates the Check Engine / Warning Light and may log an active diagnostic fault code.
P0097
Intake Air Temperature Sensor 2 Circuit Low Bank 1. This diagnostic trouble code indicates that signal voltage has dropped below the minimum calibrated threshold (typically indicating a short-circuit to chassis ground or a dead sensor). The Intake Air Temperature (IAT) Sensor measures ambient intake air temperature so the ECU can compensate for air density variations in cold or hot weather. When this circuit fails, the vehicle computer illuminates the Check Engine / Warning Light and may log an active diagnostic fault code.
P0098
Intake Air Temperature Sensor 2 Circuit High Bank 1. This diagnostic trouble code indicates that circuit voltage exceeds the maximum allowable threshold (typically indicating a short-circuit to 12V battery power or a missing ground). The Intake Air Temperature (IAT) Sensor measures ambient intake air temperature so the ECU can compensate for air density variations in cold or hot weather. When this circuit fails, the vehicle computer illuminates the Check Engine / Warning Light and may log an active diagnostic fault code.
